Delving Into SSAO
It's been awhile, but I've been busily working away on a couple of things, both related to each other: deferred shading and screen-space ambient occlusion (SSAO). Although I don't actually have deferred shading implemented yet, I do have a rough SSAO implementation, which is what I'll be discussing in this entry.
Ambient Occlusion
Before we dive into the technical details, what exactly is SSAO and, in particular, AO? Ambient lighting can be regarded as the "light that surrounds us everywhere". In other words, for any point in space, incoming light from all directions is the ambient lighting for that point. Although such a thing doesn't really exist in reality, it is a good approximation of environmental light sources, such as light from the sun, moon, or maybe even an extremely bright source of light such as lightning.
So exactly how does such light get occluded? Primarily by nearby geometry:

More geometry near the point in questions means less incoming directions are available to light that point. This is the gist of AO. There are many ways one could compute the ambient occlusion factor. One could random cast arrays from a point and find what percentage of those rays intersect nearby geometry. Ray tracing can be expensive though, as its complexity is proportional to the complexity of the scene (i.e., more geometry, more expensive to compute).
SSAO is an approximation of AO that tries to compute the AO factor from per-pixel information, such as the depth and normal information at each pixel. Since we only deal with per-pixel information, the complexity of SSAO is proportional to the screen resolution. This is great because no matter the complexity of the scene, our SSAO computation remains the same.
The G-buffer
In a deferred shading pipeline you'll often hear talk of what's called a G-buffer . The G-buffer is simply a set of textures that stores important information for each pixel. This could include information such as the normal, diffuse color, specularity, depth, and anything else necessary to help you shade a pixel.
To compute the AO factor in SSAO we only need depth and normal at every pixel. In my own implementation, I've chosen to compute everything in view space, that is, all world geometry transformed to be in the camera's basis and before any perspective corrections. Typically any point in three-dimensional space follows a series of transformations until it finally reaches a pixel on the screen:
SSAO
So I'm going to start off with a rough Python + GLSL description of the SSAO computation and work through it line by line from there. I'm assuming the first pass, which computes the G-buffer, has already been performed. If you're interested in actually computing and storing this information, look up any article on Framebuffer Objects and multiple color attachments.
def ssao(pixel, P, viewRay, gbuffer, samples, radius, power):
    #------------------------------------------------------------------
    # Reconstruct the point from depth
    #------------------------------------------------------------------
    depth = viewSpaceDepth(pixel)
    origin = vec3(viewRay, 1)*depth

    #------------------------------------------------------------------
    # Construct a matrix to go from tangent space to view space
    #------------------------------------------------------------------
    rvec = randomVector()
    normal = gbuffer.normal

    # Tangent vector; take the random vector, and subtract away its
    # projection on the normal vector
    tangent = (rvec - normal * normal.dot(rvec)).normalize()

    # Bitangent vector (just cross product to get orthogonal vector)
    bitangent = cross(tangent, normal)

    # Tangent space -> view space matrix
    tangentMatrix = mat3(tangent, bitangent, normal)

    #------------------------------------------------------------------
    # Get the ambient occlusion factor
    #------------------------------------------------------------------
    occludedSamples = 0.0
    for sample in samples:
        # Get hemisphere sample, orient it in direction of normal
        samplePt = tangentMatrix * samples[sampleIndex]
        samplePt = origin + samplePt * radius

        # Project sample into clip space, so we can sample the depth that
        # lies "under" the sample
        offset = P * vec4(samplePt, 1.0)
        offset.xy /= offset.w
        offset.xy = clipToGbuffer(offset.xy)

        # Get depth of point beneath sample
        sampleDepth = viewSpaceDepth(offset.xy)

        # Is the underlying depth beyond our threshold?
        rangeCheck = smoothstep(0.0, 1.0, radius / abs(origin.z - sampleDepth))

        # Is our sample inside a surface?
        occludedSamples += rangeCheck * step(sampleDepth, samplePt.z)

    return 1 - pow(1 - occludedSamples / len(numSamples), power)
There's a lot happening here, so let's dig in, but first let me note that I don't guarantee copying and pasting the above will work out-of-the-box.
The first step is to reconstruct the point for the current pixel. We do this by sampling the depth from our G-buffer, . There are some subtleties here that one should be aware of. First, if you explicitly store a view-space depth in the G-buffer then you're fine. If you use a texture that was attached to the depth attachment then the values are non-linear. How do we make them linear? Well, consider how a view-space depth gets projected into clip space. I'll leave it up to you to work out the math, but given a standard OpenGL projection matrix you should arrive at something like this:
Next, we need to construct a matrix that can orient a hemisphere with the pixel's normal. This hemisphere is where our samples lie to compute the occlusion factor. In this space we have the pixel's normal as the z-axis, and any two other vectors orthogonal to the normal and each other. In particular, we use a randomized vector so that our samples are not uniform across the whole screen. This helps prevent banding effects.
Finally, we actually need to decide whether or not each sample is occluded:
- Take a sample from the hemisphere.
- Transform the sample into view space.
- Project the sample into the image.
- Check the depth at that point. If this depth is in front of the sample point, the sample is occluded. Otherwise, it isn't.
We then take the percentage of occluded samples and raise it to some power. This allows us to tune how accentuated the occlusion factor is. This buffer will likely be noisy, so use any blurring technique to smooth it all out. In particular, if you choose a small noise texture to pick your randomized vectors, and repeat this texture across the screen, you'll be left with mostly high frequency noise. Any low-pass filter should help remove most of that noise.
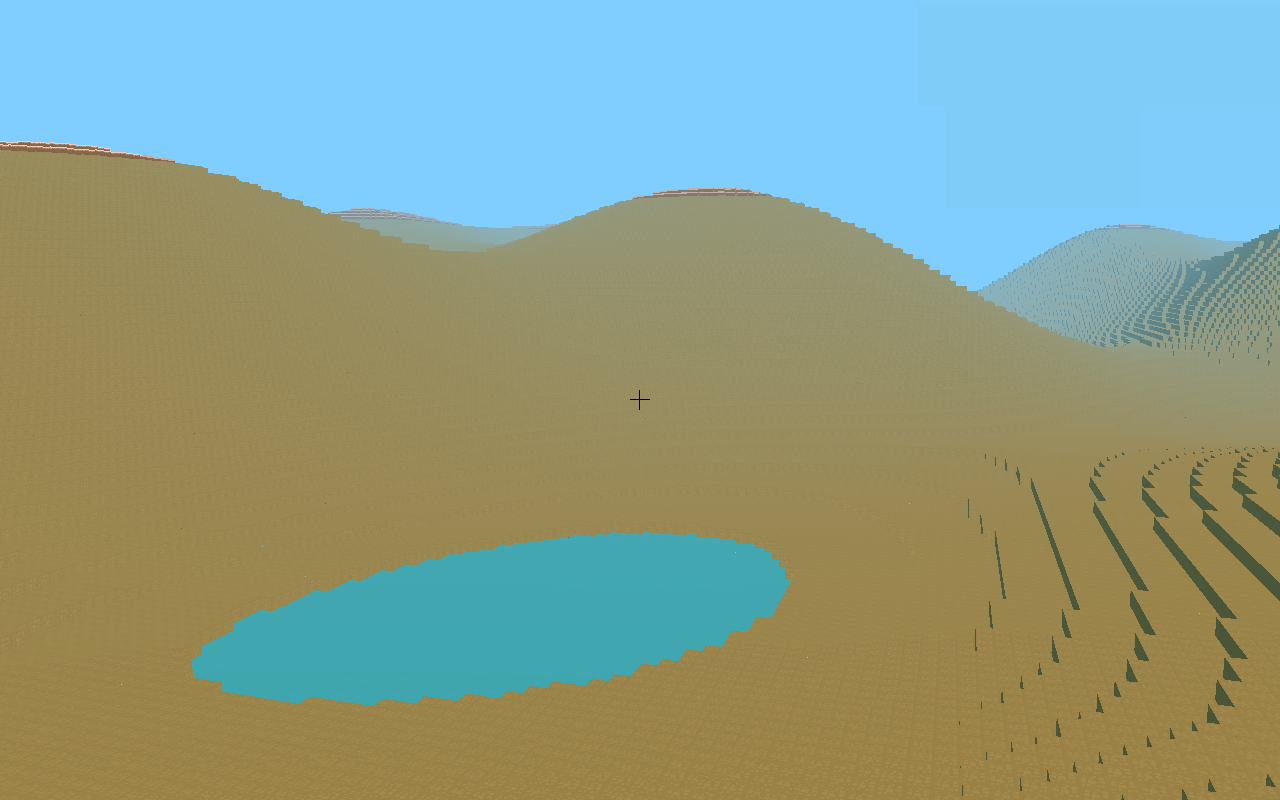
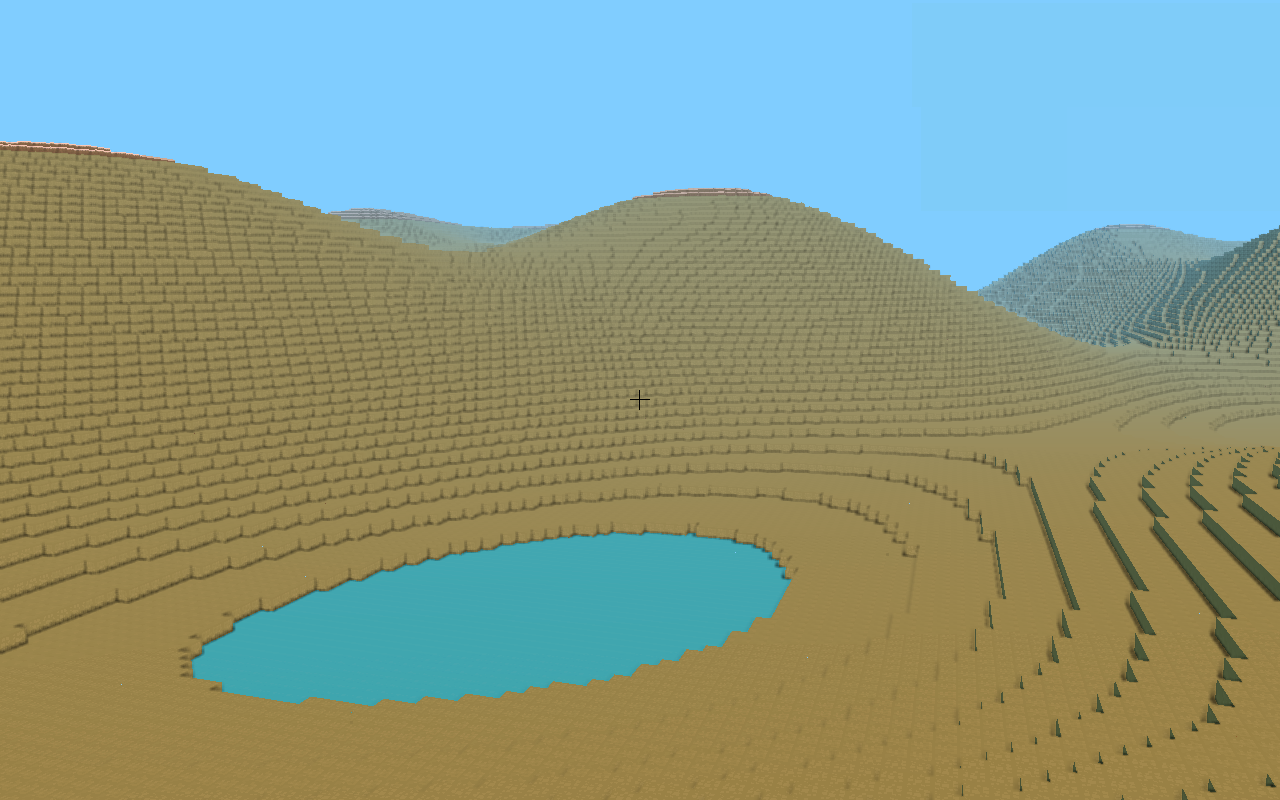
Here's a result from my own engine. Hover over the image to see how SSAO can give the scene some much-needed depth.
Of course, this was just my first attempt so there are many improvements to be made, in both performance and visuals. I'd also recommend checking out John Chapman's SSAO tutorial , of which I was inspired by.